Creating a beautiful outdoor living space can add value to your property, but getting started on the project is often easier said than done. One of the most important steps in beginning this kind of renovation is leveling the yard properly. When you’re looking to install new pavers for a patio, ensuring that your ground is even and stable makes all the difference when it comes to a lasting outdoor space – and luckily, we have tips for doing just that. Keep reading to learn our experts’ advice on how to get your yard leveled for pavers.

How to Level the Ground for Pavers without Digging
If you’re looking for a reliable, straightforward way to build a patio without all the hard labor of digging involved, paver base patio panels offer a great solution. These lightweight panels are designed to provide a sturdy foundation and make installation much easier. You won’t need to deal with hauling stone, soil, and other materials–you can simply install your pavers on top of the pre-made panels. They don’t require any digging either, so they will save you time, energy, and money. Paver base patio panels offer an effective solution for anyone looking to build a strong, level patio with minimal effort.
1. Check for pipes and wires:
Prior to starting any work on your paver project, it is important to exercise caution and due diligence. Make sure to contact local utility organizations, or dial 811, for information about pipes or wires that may exist below the area you plan to dig. Investing a bit of time in this process before breaking any ground can save you significant frustration in case you encounter any unexpected obstacles in the project.
2. Measure the area:
To accurately calculate the area of your chosen spot for adding pavers, you should begin by using a measuring tape to determine the length and width of the area; however, it is important to add 6-8 inches (15-20 cm) of extra space around the entire perimeter for safety purposes. Once these dimensions are established, you can multiply them together to gain an accurate measurement of the square area. Using this method will help ensure that your project is a successful one.

3. Calculate the size of your stone pavers:
After finding the area of your intended plot, you can take a measuring tape to find the length and width of each paver, then multiply these numbers together to determine the size of the pavers in either square feet or square meters. Then, divide the total area of your plot by the size of the individual pavers to estimate how many pavers you will need to complete the project. Be sure to measure pavers while connected if they are intended to be locked together when laid.
4. Define your installation area:
When setting up your work area, it can be helpful to use brightly colored spray paint or string as a visual guide. If using spray paint, create an outline of your work area perimeter, and if you opt for string, use stakes to secure the string along the outside of your workspace. This will not only make it easier to identify boundaries, but also help you to prevent any tripping hazards associated with having stakes in place. Additionally, spraying these stakes with brightly colored spray paint will provide another warning marker so that you don’t unintentionally stumble into them.
5. Remove topsoil:
To prepare the surface for your project, begin by gently removing the top layer of soil. No need to dig deep; a simple scooping motion with a shovel or rental sod cutter will do – just make sure to take off an even (3/4-inch) thickness. Skipping gravel fillers isn’t necessary as long as your removal is consistent across the area.
6. Tamp down the soil:
Before laying your patio pavers, ensure the soil beneath is firmly compacted for a secure foundation. For best results, use a plate compactor to tamp down the surface and achieve an even flatness to within 1/2-inch variation across the base area. This will help prevent wobbling or sinking when you step on them.
7. Lay landscape fabric and sand:
Ensure your soil remains intact by laying down a barrier of landscape fabric. Carefully spread the material across the surface to prevent blending between sand and dirt layers, protecting your garden or lawn. Then spread out polymeric or all-purpose sand evenly to cover the entire area with at least ¾ inch depth and screed it so you get an even sloped surface perfect for patios.
8. Lay panels:
To create a seamless paver patio base, lay down panels with shiplap or tongue in groove edges. For stones and bricks of differing thicknesses, add an even layer of sand to ensure the materials fit together flush and comfortably.

9. Install edging:
Begin to create your patio by installing paver edging along the perimeter you defined in step 4. Check that each panel is level for a lasting and secure fit that you can be proud of.
10. Install pavers:
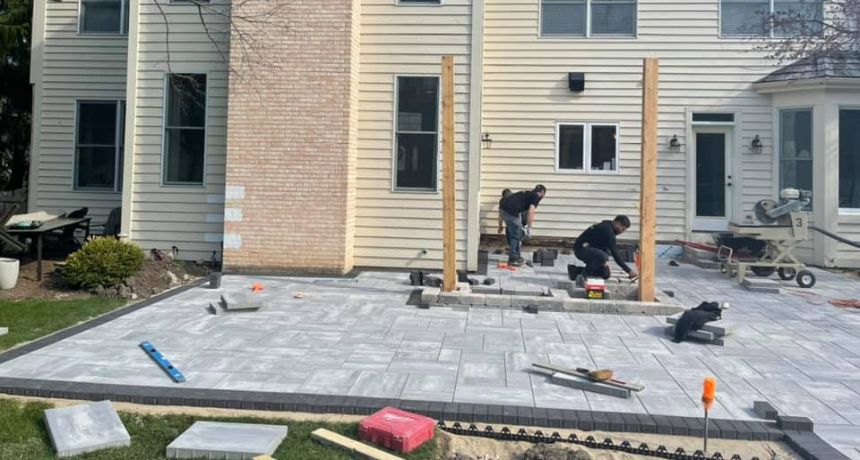
Put the finishing touches on your new patio project by laying down the stone pavers over your gravel base. The base panels will prevent any disruption to the leveled sand as you do this.
How to Re-level Uneven Pavers
Having uneven pavers can take away from the beauty of your outdoor space. Fortunately, re-leveling them can be a simple weekend project anyone can do with the right tools and determination.
- First, remove soil around the area you’re working on and place it in a pile near where you’ll be working.
- Next, inspect each paver to make sure that any cracks or chips are sealed properly with suitable material like concrete filler.
- After that, compact the soil around the edge of each paver to ensure they will not move during usage.
- Finally, fill the holes between each of the pavers with sand which will help keep everything level when it dries.
With these steps followed closely, you should now have nicely re-leveled pavers which can provide years of enjoyment.
Leveling the ground for new stone pavers can be a relatively easy and straightforward process if you’re equipped with the right knowledge. Once the process is complete, you will have an attractive hardscape that will provide a beautiful addition to your home. Whether you want a paver entrance, walkway, patio, driveway, or pool area, by following the steps in this guide, you are sure to achieve aesthetically pleasing and long-lasting results. When it comes to outdoor improvements like these, having properly leveled surfaces make all the difference and it’s well worth making the extra effort to get the job done right. For a professional paver installation in north Chicago suburbs areas, contact Pavestone Brick Paving anytime at (847) 895-7001.


