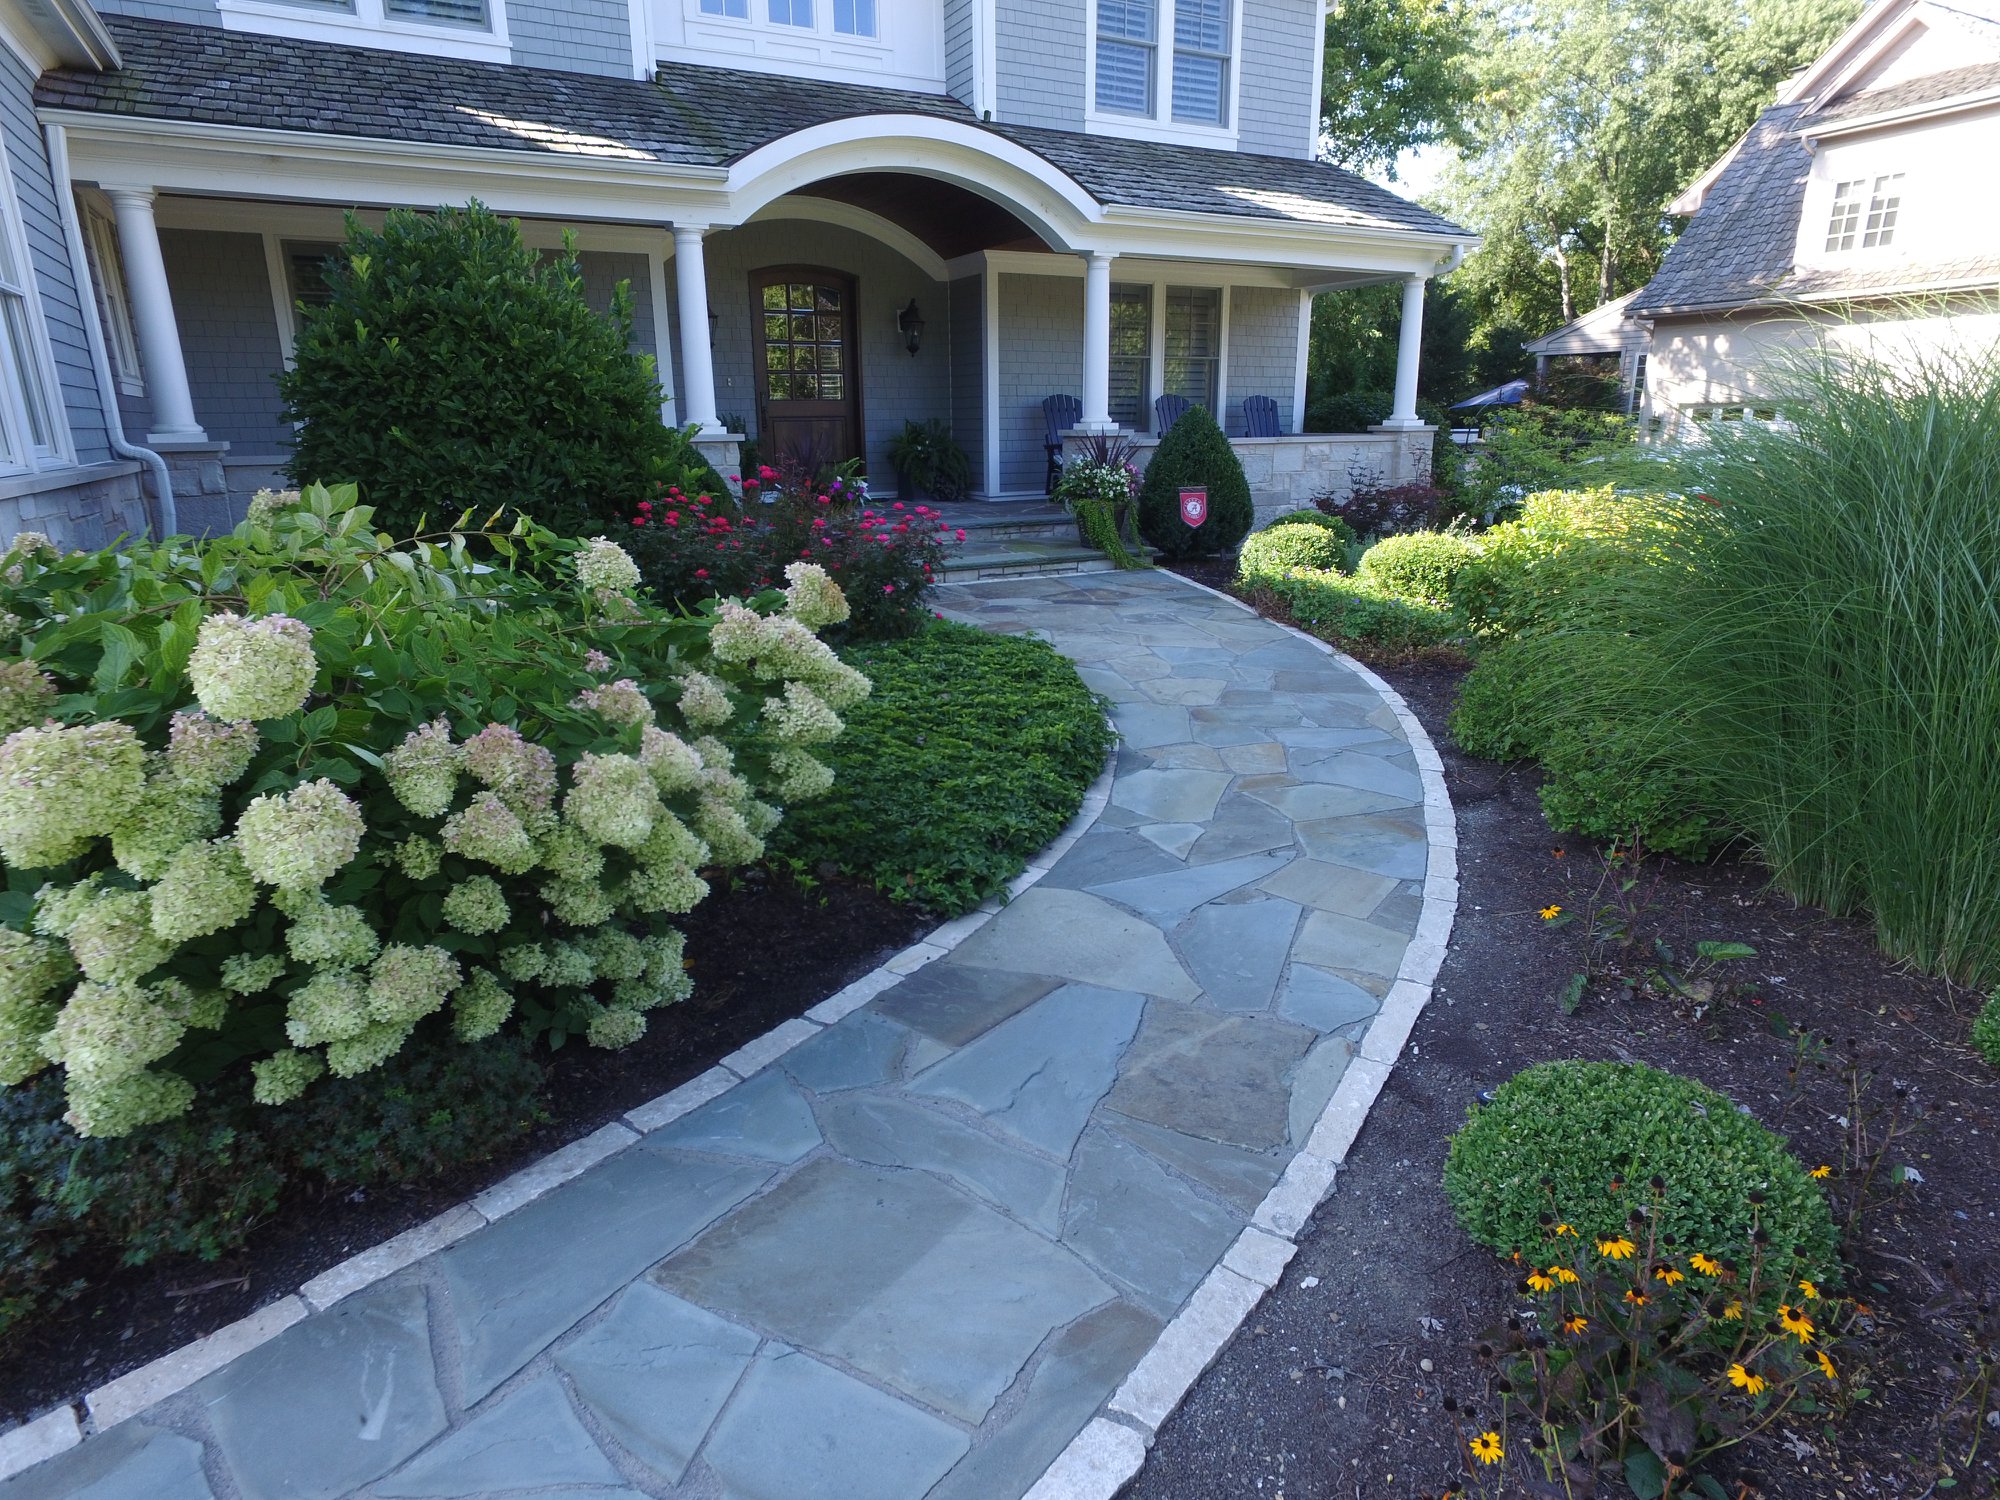
Enhance your lawn with a beautifully crafted paved walkway. Perfect for areas with heavy foot traffic or where erosion is a concern, a paved walkway adds both functionality and charm. Whether designed with a staggered pattern or a sleek rectangular layout, paved walkways can be tailored to suit any aesthetic.
Unlike traditional concrete sidewalks, paved walkways offer a more eco-friendly solution for water runoff. Rainwater naturally absorbs into the surrounding turf, keeping the walkway clean and dry for easy use. Additionally, they shield your lawn from damage caused by frequent foot traffic, while allowing lawn mowers to glide effortlessly over them. A paved walkway not only elevates your outdoor space but also ensures long-lasting convenience and protection.
1. Plan the Walkway
Various designs can be applied to paved walkways. From herringbone to pinwheel and running bond, the patterns are countless. Some patterns, like herringbone, are advanced and require extra cutting. However, easy installation comes with stamped pavers or natural stone slabs.
Determine the width of the walkway. Comfortable widths include 48 inches, as it allows people to walk side by side. The standard width is 36 inches. Consider mobility devices, like wheelchairs, which require a 36-inch width plus a 60-inch-wide turnaround area.
2. Check Building Codes
Prior to starting the project, check for building codes and contact the homeowner’s association to learn about restrictions or mandatory instructions. A permit may be required in some areas. Call 811 before beginning the excavation, as it’s a legal requirement in Illinois to check for underground utilities.
3. Prepare the Lawn
Use string and stakes to designate the area for the pavers. If the walkway will be curved, mark the curve with a hose. Lay a 2-by-4 in between to maintain an equal width throughout. Cut the area with a shovel to identify the digging area once the hose is removed.
Excavate the marked areas with a shovel. Alternately, if the space is large, rent a sod cutter. Dig to a depth that matches the paver height or allows it sit slightly above ground level. Aim to dig the trench slightly wider than the walkway to allow room for paver restraints.
Bury any cables for landscape lighting and tamp the dirt. A rented plate compactor performs the task efficiently, but a hand tamper can be used for small areas. Once the ground is firm, lay a weed barrier that extends slightly beyond the excavated space.
4. Install the Foundation
Sand is used to create a firm base for the paver walkway. Ensure the sand base is uniform by placing two ½-inch-diameter PVC pipes on the ground, covering them with sand. Pull a 2-by-4 over the sand to level it. Remove the pipes and refill the gaps with more sand.
5. Lay the Paver Panels
Paver panels are lightweight and designed to be an alternative to traditional paver bases. Align the first paver panel, preferably against a straight edge, such as a patio. Continue laying the panels until the entire walkway is covered. Use a utility knife to cut away any excess.
6. Install the Pavers
Begin by placing the pavers along the outer border and against a straight edge. Work inward, filling in the walkway with pavers. Leave a ¼-inch gap (the space may vary depending on the walkway) to fill in with jointing sand later. Every 12 inches, install edging along the perimeter.
Continue installing the pavers until the entire walkway is filled. Check that the pavers are level. Make adjustments by tapping down pavers with a rubber mallet or adding more sand. If the walkway is curved, the pavers will need to be cut with a circular saw.
7. Finish with Jointing Sand
Filling the paver gaps with sand is a simple but crucial step. Polymeric jointing sand offers a strong bond due to its additives. Pour the sand over the pavers while making sure the blocks are fully dry before doing so. Use a push broom to sweep the sand into the joints.
Settle the pavers with a hand tamper. If necessary, add more sand. Upon filling the joints with sand, blow away the excess with a leaf blower. Be careful to remove all traces of excess polymeric sand, since contact with moisture can create an unremovable white haze.
Spray the walkway with a garden hose; the water activates the polymeric sand and binds the pavers. Allow the sand to cure for 24 hours. The binding agents contained within the polymeric sand fully secure the pavers, ensuring they do not loosen out of place.
8. Add Decorative Elements
Separate the walkway from the lawn by adding mulch to the perimeters. If desired, plant colorful flower beds along the walkway for a lovely finishing touch. To enhance nighttime visibility and beauty, install landscape lighting, like mushroom pathway lights, to the edges of the walkway.
Paver Walkway Installation from Pavestone
While homeowners can tackle a paved walkway pathway, they should consider delegating the task to the pros at Pavestone Brick Paving, Inc, for a seamless look. We’re a well-known paver walkway contractor with the skills and industry experience to design and install stunning paved walkways.
Homeowners are given a myriad of paver options. Natural stone slabs offer exceptional beauty, as they are cut from rock formations. Stone is durable, cost-effective, and versatile, since it can be laid on walkways and steps as well as border walls.
Brick pavers are another durable option for paved walkways. Our Unilock brick pavers are available in numerous styles, shapes, and colors to fulfill a range of aesthetic needs, from rustic to classic and contemporary. The smooth, sturdy surface of brick pavers is safe and easy to maintain.
We not only build gorgeous paver walkways but add finishing touches that give them unique charm. Our professionals are available to line the walkway with lights, add structural embellishments, like pillars, and incorporate retaining walls to create an attractive, functional border.
Pavestone Brick Paving is among the top paver walkway contractors in Chicagoland’s northern suburbs. Homeowners trust us for our impeccable workmanship and comprehensive services, from design to quality walkway installation and maintenance. Call our Des Plaines, Illinois, office today to learn more.